Sunday, September 17, 2023

Change the Default Application Directory in JDeveloper 12.2.1.4 and 11.1.2.3

Just for my note, I want to change the Default Application Creation Directory while clicking 'New Application' menu in Application Navigator in JDeveloper.

Edit Applications.xml file at C:\Users\user\AppData\Roaming\JDeveloper\system12.2.1.4.42.190911.2248\o.jdeveloper like below.

Update <workDirectory path> with your desired directory.

<?xml version = '1.0' encoding = 'UTF-8'?>
<system nselem="system" class="oracle.ide.model.IdeSystem" xmlns="http://xmlns.oracle.com/jdeveloper/110000system">
   <listOfChildren class="oracle.ide.model.DataList">
      <Item class="oracle.ide.model.Workspaces">
         <activeProjectMap class="java.util.HashMap"/>
         <activeWorkspaceURL/>
         <listOfChildren class="oracle.ide.model.DataList"/>
         <workDirectory path="/D:/JDeveloper/mywork/12.2.1.4/"/>
      </Item>
      <Item class="oracle.ide.model.Connections"/>
   </listOfChildren>
   <preferences>
      <preferencesMap class="java.util.HashMap">
         <Item>
            <Key>DefaultProject</Key>
            <Value class="java.net.URL" path="DefaultWorkspace/Project1.jpr"/>
         </Item>
         <Item>
            <Key>DefaultWorkspace</Key>
            <Value class="java.net.URL" path="DefaultWorkspace/DefaultWorkspace.jws"/>
         </Item>
      </preferencesMap>
   </preferences>
</system>


Full Functional Workaround For CreateDefaultDomain.py Failing in Integrated WebLogic Server in JDeveloper 11.1.2.3.0

As Already referenced in my earlier post about a workaround for Failing CreateDefaultDomain.py script in Windows 11, here is a fully working workaround. It does start/stop IntegratedWLS from IDE as well as controlling the Deployment of Application and launching the Browser. 

The Idea is that copy the Existing Working Setup from Different Machine to New Machine.In My case, I have a running IntegratedWLS Setup in Windows7 64 Bit Machine which is running on below Ports -

Host - 127.0.0.1

User/Pwd - weblogic/weblogic1

Port - 7101, 7102(SSL)

My Target Machine is Windows 11 64 Bit where I am going to paste the System Folder of JDeveloper from Windows 7. However, Key note is that in your Target Machine, installation Folder of JDeveloper + Logged in User Folder should be same of Windows 7 b'coz DefaultDomain References some of the Libraries in Installation Folder. 

To copy existing settings -

1. Installation Folder in Windows 11 would be same. Since 'DefaultDomain' references libraries in JDeveloper Installation Folder.E.g. Windows 7 Installation Folder - 'D:\Middleware-11-1-2-3', so Windows 11 installation would be in 'D:\Middleware-11-1-2-3'

2.Logged-in User in Windows 7 should also be same of Windows 11. Since I had different logged-in user in Windows7, so I created same logged-in user of Windows 11 in Windows7.In Windows7 I created 'user' from Control Panel > User Accounts(same password also with Administrator Rights). Logged-in with 'user' in Win7, open JDeveloper 11.1.2.3, here JDeveloper will ask to copy settings from old installation, select 'No' and it will create new 'system11.1.2.3.39.62.76.1' Folder under 'user'.Note here my new logged in user name is 'user', so a 'user' folder will be created on FileSystem.

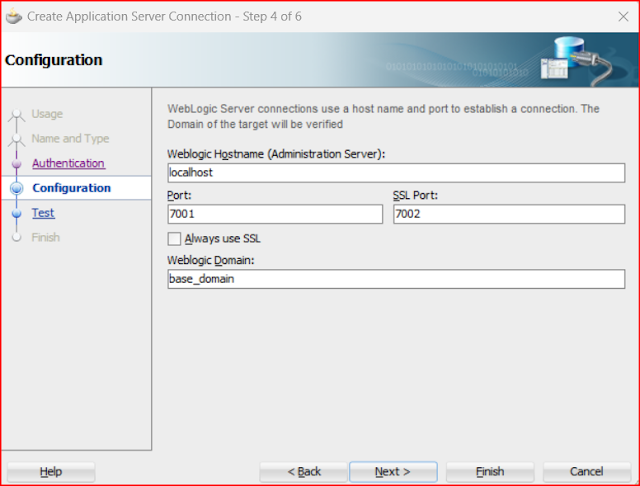
3.Still being in Win7, in JDeveloper, open 'ApplicationServer' Navigator. Create a 'DefaultDomain' by inputing below Details. I had totally changed Ports in new IntegratedWLS Setup.

I have kept 'weblogic/weblogic1' credentials same that was in old setup in Win7 running on 7101,7102 Ports, although I think it's not needed.As mentioned already, I changed the Ports to 7601,7602 in new setup in Win7.


4.Once Default Domain Creation under 'user' done in Win7, close JDeveloper.

5.Copy the 'system11.1.2.3.39.62.76.1' from Win7 from 'user' folder path. This is my path of system folder in Win7 under 'user' - 'C:\Users\user\AppData\Roaming\JDeveloper\system11.1.2.3.39.62.76.1'

6.Log-in to Win11 with 'user'. Close JDeveloper if it open.

7.If you have already System Folder Created in Win11, delete it. Paste the copied system folder at 'C:\Users\user\AppData\Roaming\JDeveloper' in Win11.

8.Open the JDeveloper, you should able to see that IntegratedWLS created and configured correctly.


9.Now it's time to run the WLS and it is started/stopped successfully.


10.Now Open any ADF Application and Try to run the JSPX Page, it should Trigger the Running of WLS and should open the Browser.

So, this workaround is Fully Functional.

Screengrab from Win 11 -


Saturday, September 16, 2023

Workaround for CreateDefaultDomain.py Error For IntegratedWebLogic Server

When Trying to Install JDeveloper 11.1.2.3.0 in Windows 11 64 Bit Environment, installation was successful but Creation of IntegratedWebLogic was Failing.

CreateDefaultDomain.py execution was not going correctly.

Certification Matrix Link - https://www.oracle.com/application-development/technologies/jdeveloper/jdev11gr2-cert.html

https://docs.oracle.com/cd/E24902_01/doc.91/e23434/install_config_win.htm#EOHLU107

Error Log not giving any exact detail about the Error.Below is the Log output.

Log File:      C:\Users\user\AppData\Roaming\JDeveloper\system11.1.2.3.39.62.76.1\o.j2ee.adrs\CreateDefaultDomain.log
Label:         JDEVADF_11.1.2.3.0_GENERIC_120914.0223.6276.1
Product Home:  C:\Middleware11123\jdeveloper\jdev\
Domain:        C:\Users\user\AppData\Roaming\JDeveloper\system11.1.2.3.39.62.76.1\DefaultDomain

"C:\Middleware11123\oracle_common\common\bin\wlst.cmd" "C:\Users\user\AppData\Roaming\JDeveloper\system11.1.2.3.39.62.76.1\o.j2ee.adrs\CreateDefaultDomain.py"
Process started
Elapsed time:  32 ms

Decided to try a workaround for installing of IntegratedWLS.The Idea was to install WLS10.3.5 separately and create a WLS connection from IDE. For Deployment of any application, WAR/EAR files need to upload through IDE in WLS.

Open Quick Start from JDeveloper Installation Menu.


Select 'Start Admin Server' and click 'Done' to start the Web Logic Instance.

Since I had already base_domain created, to avoid any conflict and overwriting the installation, 'base_domain' name changed to 'base_domain_test'. I had already created one 'base_domain' earlier.
I will be using original 'base_domain' in rest of the Screengrab.

While keeping the AdminServer Running Switch to JDeveloper IDE.


Port, SSL Port, base_domain should be same as it was created in WLS Instance.


From JDeveloper Project Menu, select 'Deploy' and Select your Application for further deployment.


Note that Triggering of Automatic Application in browser is not going to happen, so manually open the browser and hit the URL shown in log. For Example - http://localhost:7001/slider/faces/ImageSliderPage.jspx


One Reference from this Link is also workable but after successful installation of WLS, JDeveloper do not know that Integrated WLS is created. In short, even WLS is get started, application deployment cycle is not taken care by JDeveloper IDE. 

A Fully Functional Post about same Topic is here.

Saturday, June 10, 2023

JDeveloper 12.2.1.4 Self Extraction Setup Failed

 While Installing JDeveloper Studio Edition 12.2.1.4 Self Extraction Failed.


By checking the Launcher Log itself gives the Reason and Solution for the Failure.

com.oracle.cie.nextgen.launcher.Launcher - 
The jar file E:\JDeveloper12.2.1.4\V998593-01-2.zip needed for this installer is missing.

Rename the Original Downloaded Zip File to V998593-01-2 and run the Self Extraction Setup again.
This should complete the Self Extraction and bring the Installation Dialog.


CreateProcess Error=206, The Filename or Extension is too Long

 JDeveloper  12.2.1.3.0

After Creating Service Interface in AppModule, running the AppModule gives the Error "CreateProcess Error=206, The Filename or Extension is too Long".

Double click to Open Project Properties Dialog in which the Service Interface Exposed.

Remove the 'JAX-WS Web Services' Library, Click OK and Re-run the AppModule.


Friday, March 10, 2023

Oracle ADF to Stripe Payment Gateway Integration in JDeveloper Studio Edition Version 12.2.1.3.0.

Below is the Sample for Oracle ADF to Stripe Payment Gateway Integration in JDeveloper Studio Edition Version 12.2.1.3.0. The Sample is based on Invoice Payment Amount from JSPX Page to Redirecting to Pre-Built Checkout Page of Stripe.

There is no need to connect with Secure Connection(HTTPS) for Testing of Stripe Sandbox Environment.

Sign-Up to Developer Account in Stripe to get Secret Key for Sandbox Environment. This Key will be used in Sample to create Checkout Session. Minimum JARs required to Run the Sample and Sample Source Download Link is Provided in Video Link.

Stripe Documentation - 

https://stripe.com/docs/checkout/quickstart

https://stripe.com/docs/payments/accept-a-payment

Youtube Video Link - https://youtu.be/zhgQBducXc0


Wednesday, February 9, 2022

How to Create Multiple Virtual Server and Install Word-Press in QNAP QTS 5.0.0.1932

QNAP QTS 5.0.0.1932

A QNAP NAS can have Multiple Virtual Server running on same IP and Port. Different Port can also given. Open 'Web Server' from Control Panel. Your 'Web Server' must be enabled and running as shown below.


Click 'Virtual Host' tab and click 'Enable Virtual Host', then click 'Create a Virtual Host'.

Give the 'Host Name' as 'TestSite1' (No Quotes).

Select 'Root Directory' as your Install Folder. Create 'TestSite1' Folder manually in File System before choosing the folder in 'Root Directory'.

Choose 'Protocol' HTTP and 'Port Number' 80. Click 'APPLY'.


Unzip the Download. Copy all unzipped files and paste into 'TestSite1' Folder.


Create a different database for 'TestSite1' as TestSite1' if you want a separate database for each virtual server, otherwise skip this step.


Run the Word-Press URL in Browser - http://NAS-IP/TestSite1 to complete the Word-Press installation. Provide the Database Name, Root User Name, Root Password for Database, Host and Prefix etc. Finish the Installation and access login url by - http://NAS-IP/TestSite1/wp-login.php


Tuesday, February 8, 2022

WordPress Folder Not Visible in QNAP NAS QTS Version 5.0.0.1891

QNAP NAS QTS Version 5.0.0.1891 

Installation Folder for WordPress 5.8.2 does not appear after installation from App Center.
By Default WordPress Folder should appear under '\\DataVol\Web\WordPress'.
 

Remove the WordPress 5.8.2.
Then WordPress 4.9.5.0.1 can be used as an alternate solution. The Zip Version can be downloaded via WordPress older release (https://wordpress.org/wordpress-4.9.5.zip). Installing WordPress from Zip is little different than QNAP Link (https://download.qnap.com/QPKG/WordPress_4.9.5.0.1.zip) .

QNAP Link - https://www.qnap.com/en/app_center/  (You need to Provide Correct QTS Version 4.5.3~4.5.4 to get WordPress 4.9.5.0.1 QPKG)

I will continue here QPKG Download. Unzip the Zip file downloaded from QNAP.
Open 'Install Manually' from App Center. Locate your QPKG file and Click 'INSTALL'.
Once Installation done, check for the WordPress Folder under '\\DataVol\Web' in your NAS.

Manual


Wednesday, July 8, 2015

Warning : java.lang.IllegalArgumentException: .jsff is not a source file

Oracle JDeveloper 11.1.2.3

While running an application designed with TaskFlow & Page Fragments got below error

Warning: weblogic.utils.compiler.ToolFailureException: Unexpected exception while compiling jsps :java.lang.IllegalArgumentException: The file file:<Path>\page.jsff is not a source file
 
Solution - Add in web.xml file below lines to specifically recognize jsff page pattern.

<jsp-config>
    <jsp-property-group>
      <url-pattern>*.jsff</url-pattern>
      <is-xml>true</is-xml>
    </jsp-property-group>

</jsp-config>


Refer - https://blogs.oracle.com/jdevotnharvest/entry/warning_java_lang_illegalargumentexception_the

oracle.jbo.PersistenceException: JBO-34000: Definition class name missing in XML file of type task Flow

Oracle JDeveloper 11.1.2.3

While doing some copying of Project Source File Content into New Application Source, upon running the page found below error -

oracle.jbo.PersistenceException: JBO-34000: Definition class name missing in XML file of type task Flow

I was copying the content from DataBindings.cpx into new DataBindings.cpx file for a new application & missed to include <definitionFactories/> .

Solution - Open DataBinding.cpx file. Paste the below lines -
<definitionFactories>
        <factory nameSpace="http://xmlns.oracle.com/adf/controller/binding"
                 className="oracle.adf.controller.internal.binding.TaskFlowBindingDefFactoryImpl"/>
        <dtfactory className="oracle.adf.controller.internal.dtrt.binding.BindingDTObjectFactory"/>
        <factory nameSpace="http://xmlns.oracle.com/adfm/dvt"
                 className="oracle.adfinternal.view.faces.dvt.model.binding.FacesBindingFactory"/></definitionFactories>


This should resolve the issue.

Tuesday, July 7, 2015

How to Resolve JDeveloper IDE Corruption ?

Oracle JDeveloper 11.1.2.3
Windows 7

Recently while doing some work in JDeveloper noticed, Project Hierarchy in "Application Navigator" is overlapping down on "Application Resources" & "Data Control" Panel.

"Data Control" Panel is stuck and not expanding. Reason for these abnormalities is corruption of DefaultWorkSpace file in System Folder.


Solution - Navigate to C:\Users\it_rashid\AppData\Roaming\JDeveloper\system11.1.2.3.39.62.76.1,
Rename or Delete folder "o.jdeveloper". Restart JDeveloper if it is open. This should resolve the issue.